

How To Change Notification Background Color On Samsung S10+

- Selected Reading
- UPSC IAS Exams Notes
- Developer's Best Practices
- Questions and Answers
- Effective Resume Writing
- Hour Interview Questions
- Computer Glossary
- Who is Who
How to alter notification background colour in Android?
This instance demonstrate about How tin I marquee the text content in Android Notification.
Step 1 − Create a new project in Android Studio, get to File ⇒ New Project and fill all required details to create a new projection.
Footstep two − Add the following lawmaking to res/layout/activity_main.xml.
<? xml version = "ane.0" encoding = "utf-8" ?> <RelativeLayout xmlns: android = "http://schemas.android.com/apk/res/android" xmlns: tools = "http://schemas.android.com/tools" android :layout_width = "match_parent" android :layout_height = "match_parent" tools :context = ".MainActivity" > <Button android :layout_width = "match_parent" android :layout_height = "wrap_content" android :layout_centerInParent = "true" android :layout_margin = "16dp" android :onClick = "createNotification" android :text = "create notification" /> </RelativeLayout>
Footstep 3 − Add the following lawmaking to res/layout/custom_notification_layout.xml.
<? xml version = "1.0" encoding = "utf-8" ?> <RelativeLayout xmlns: android = "http://schemas.android.com/apk/res/android" android :id = "@+id/layout" android :layout_width = "fill_parent" android :layout_height = "64dp" android :background = "@color/colorAccent" android :padding = "10dp" > <ImageView android :id = "@+id/prototype" android :layout_width = "wrap_content" android :layout_height = "fill_parent" android :layout_alignParentStart = "true" android :layout_marginEnd = "10dp" android :contentDescription = "@string/app_name" android :src = "@mipmap/ic_launcher" /> <TextView android :id = "@+id/championship" android :layout_width = "wrap_content" android :layout_height = "wrap_content" android :layout_toEndOf = "@id/image" android :text = "Testing" android :textColor = "#000" android :textSize = "13sp" /> <TextView android :id = "@+id/text" android :layout_width = "wrap_content" android :layout_height = "wrap_content" android :layout_below = "@id/title" android :layout_toEndOf = "@id/image" android :ellipsize = "marquee" android :singleLine = "truthful" android :text = "Lorem Ipsum is just dummy text of the printing and typesetting industry. Lorem Ipsum has been the industry's standard dummy text always since the 1500s, when an unknown printer took a galley of type and scrambled it to make a blazon specimen book. It has survived not but v centuries, but besides the leap into electronic typesetting, remaining essentially unchanged. It was popularised in the 1960s with the release of Letraset sheets containing Lorem Ipsum passages, and more than recently with desktop publishing software like Aldus PageMaker including versions of Lorem Ipsum. " android :textColor = "#000" android :textSize = "13sp" /> </RelativeLayout>
Pace 4− Add the following lawmaking to src/MainActivity.
package app.tutorialspoint.com.notifyme ; import android.app.NotificationChannel ; import android.app.NotificationManager ; import android.os.Bundle ; import android.support.v4.app.NotificationCompat ; import android.back up.v7.app.AppCompatActivity ; import android.view.View ; import android.widget.RemoteViews ; public class MainActivity extends AppCompatActivity { public static last String NOTIFICATION_CHANNEL_ID = "10001" ; private final static String default_notification_channel_id = "default" ; @Override protected void onCreate (Bundle savedInstanceState) { super .onCreate(savedInstanceState) ; setContentView(R.layout. activity_main ) ; } public void createNotification (View view) { RemoteViews contentView = new RemoteViews(getPackageName() , R.layout. custom_notification_layout ) ; NotificationManager mNotificationManager = (NotificationManager) getSystemService( NOTIFICATION_SERVICE ) ; NotificationCompat.Builder mBuilder = new NotificationCompat.Architect(MainActivity. this, default_notification_channel_id ) ; mBuilder.setContent(contentView) ; mBuilder.setSmallIcon(R.drawable. ic_launcher_foreground ) ; mBuilder.setAutoCancel( true ) ; if (android.os.Build.VERSION. SDK_INT > = android.os.Build.VERSION_CODES. O ) { int importance = NotificationManager. IMPORTANCE_HIGH ; NotificationChannel notificationChannel = new NotificationChannel( NOTIFICATION_CHANNEL_ID , "NOTIFICATION_CHANNEL_NAME" , importance) ; mBuilder.setChannelId( NOTIFICATION_CHANNEL_ID ) ; assert mNotificationManager != nil; mNotificationManager.createNotificationChannel(notificationChannel) ; } assert mNotificationManager != null; mNotificationManager.notify(( int ) System. currentTimeMillis () , mBuilder.build()) ; } } Stride 5 − Add together the following lawmaking to AndroidManifest.xml
<? xml version = "1.0" encoding = "utf-8" ?> <manifest xmlns: android = "http://schemas.android.com/apk/res/android" packet = "app.tutorialspoint.com.notifyme" > <uses-permission android :proper name = "android.permission.VIBRATE" /> <application android :allowBackup = "truthful" android :icon = "@mipmap/ic_launcher" android :label = "@cord/app_name" android :roundIcon = "@mipmap/ic_launcher_round" android :supportsRtl = "truthful" android :theme = "@style/AppTheme" > <activity android :name = ".MainActivity" > <intent-filter> <action android :name = "android.intent.action.Chief" /> <category android :proper noun = "android.intent.category.LAUNCHER" /> </intent-filter> </activity> </application> </manifest>
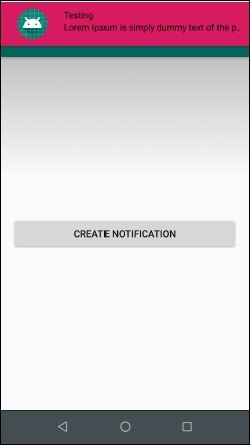
Let'south try to run your awarding. I assume you have connected your actual Android Mobile device with your computer. To run the app from android studio, open up 1 of your project's action files and click Run ![]() icon from the toolbar. Select your mobile device as an selection and then cheque your mobile device which will brandish your default screen −
icon from the toolbar. Select your mobile device as an selection and then cheque your mobile device which will brandish your default screen −
Click hither to download the project code

Published on 16-May-2019 11:07:32
- Related Questions & Answers
- How to Schedule Notification in Android?
- How to remove notification from notification bar programmatically in android?
- How to change the background color of ListView items on Android?
- How to set android notification icon?
- How to change the background color of the options card in Android?
- How to use Singleton Notification in android?
- How to alter the abline colour created using ggplot2 in R?
- How to change the background color of ListView items on Android Kotlin?
- How to play an android notification audio?
- How to notice a new Android notification?
- How to create Android Notification with BroadcastReceiver?
- How to Create a Reminder Notification in Android?
- How to use Notification Inbox style in Android
- How to shut the notification panel afterwards notification button is clicked in Android?
- How to modify the background color of ListView items on Android using Kotlin?

Source: https://www.tutorialspoint.com/how-to-change-notification-background-colour-in-android
Posted by: holtvared1955.blogspot.com
0 Response to "How To Change Notification Background Color On Samsung S10+"
Post a Comment